In this tutorial we will learn how to simulate gravity and make a ball look like it's bouncing around the screen!
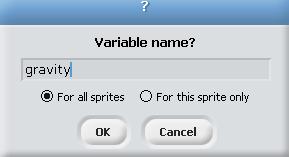 |
| ...make a new variable for all sprites and call it 'gravity.' |
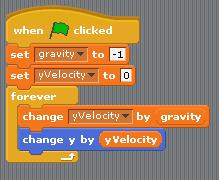 |
| Set the initial values of gravity and yVelocity like so, then in a forever loop change yVelocity by gravity and y of your sprite by yVelocity. What this means is that gravity will always be pulling our sprite down in the -y direction. |
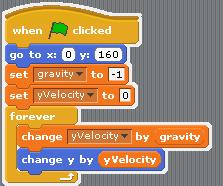 |
| Add a "go to x (0) y (160)" block to the beginning of our scripts block to set the initial position of our sprite. Press the green flag to see what happens. Does the ball start at the top of the screen then fall down? |
Next we'll try to get our sprite to bounce off the ground.
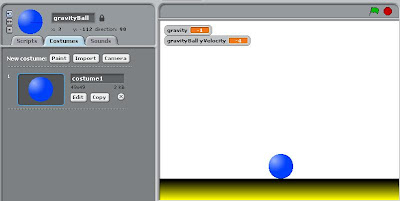 |
| I've added a background to our stage, just a simple line representing the ground. In order to move on, we need to know what we want to represent as ground level for our sprite. |
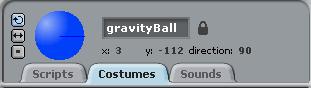 |
| To do this, put the ball so that it is just barely touching your ground level. Note the y position in the sprite details box? Mine says -112, so I'm going to use that as my ground level. |
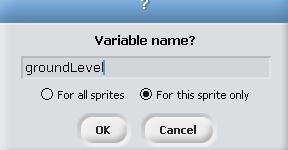 |
| That's right, another variable! This one we'll make for this sprite only and call groundLevel. |
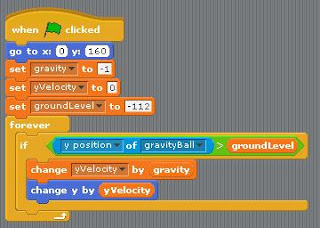 |
| We want to prevent our ball from going below ground level, so we put an if block around the changes in y position. In this case we check to see if the yposition of gravityBall is > groundLevel. If it is, we can go ahead and change y! What happens when you press the green flag now? Mine starts at the top of the screen and falls until it touches the ground! |
But we have a problem, don't we? My ball goes below the ground level, hmmm. Aha! It must be that it is moving too fast and goes past the ground level before it has a chance to adjust! Let's account for this in our scripts.
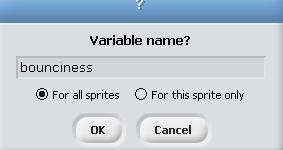 |
| Before we move on, let's make a bounciness variable for all sprites |
 |
| Let's set bounciness to be -.9 so that when we do some calculations later we can use this value. |
 |
This looks like a lot of scripts! Oh no! Let's break it down a little.
We have an if block that we are using to check if we are touching the ground. We take care of this by checking the yPosition of gravityBall as being both lessThan or equal to our groundLevel variable.
If the ball is at or below groundLevel, we set it to be just above groundLevel (as if it had just touched the ground).
Then we set yVelocity to equal yVelocity * bounciness. Remember how bounciness was -.9? This means that yVelocity will be a negative (opposite) smaller fraction of itself. It will head in the other direction at a slower pace! |
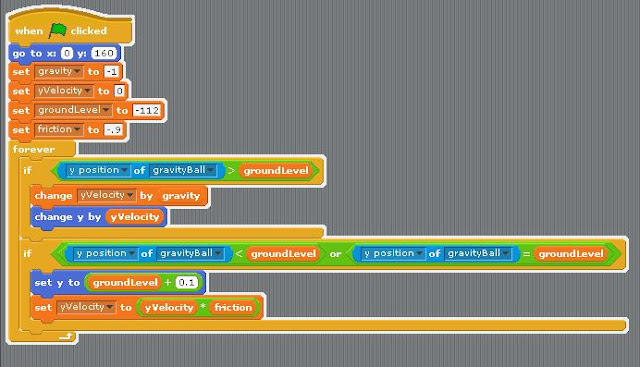 |
| Let's do a quick recap. Your scripts so far should look like this (except where it says 'friction' here it should say 'bounciness', I got a little confused there for a second). What does your project do now when you press the green flag? |
Awesome! We should now have a ball that bounces up and down, but eventually slows down and comes to a stop. If yours doesn't do this, review these previous steps before moving on to the next section.
Once you're ready to move on, let's incorporate some lateral bounciness (make it move left and right, too)!
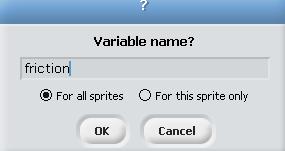 |
| First things first, what do we need? Another variable! The first variable we'll need is friction. Like bounciness, this will determine how much our movement changes over time. Friction applies to all sprites. |
 |
| Let's start friction out at -.01 because it will always be acting on our xVelocity, unlike bounciness which only changes our yVelocity when it hits groundLevel. |
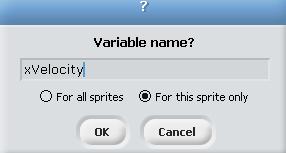 |
| We'll also need an xVelocity and we'll make it for this sprite only. |
 |
| Let's add this line to our starting scripts setting the xVelocity to be a number between -10 and 10. |
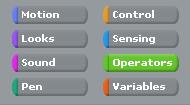 |
| Next we'll check to see if it's moving at all left or right. Go to the operators menu. |
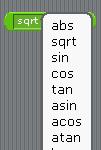 |
| Grab the block that says [sqrt] (10). This is a block with lots of different math equations in it. The one listed there automatically is the square root. We are looking for the one that gives us the absolute value of a number, which is 'abs.' The absolute value of a number is how far away it is from zero, whether positive or negative, and will give us a positive number. Let's see how this is useful to us. |
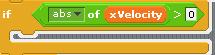 |
| This is where abs comes in handy. We only want to change our x position if the xVelocity is not zero. If our velocity is zero it shouldn't be moving at all! So, we ask if the absolute value of xVelocity is greater than 0, if it is we can move on. |
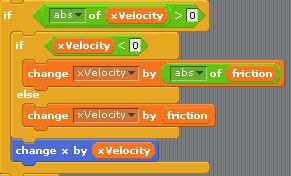 |
| So, now that we've determined if we're still moving in an x direction, we need to know which direction that is. Since there are only two possibilities we will use an 'if else' block. For the if portion we check to see if we are moving left by asking if xVelocity is less than 0. If that is the case then we change our xVelocity by the absolute value of friction. If our xVelocity is not less than zero (so it would have to be greater than zero) we change our xVelocity by friction. Finally, after determining what our xVelocity should be, we change our x position by our xVelocity. |
Let's go over some of the numbers above so we can have a better understanding of how this is supposed to work. First of all, let's say our xVelocity is 10. Since xVelocity is 10, we know that we are moving and will then check to see which direction. Since 10 is not less than 0, we go to the else portion of the if/else block. The script there says to change xVelocity (10) by friction (-.01) so our xVelocity becomes 9.99. Over time this adds up and our ball will eventually stop, having passed from 9.98, 9.97, 9.96,... .03, .02, .01, 0.
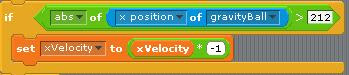 |
| Can you guess what this last bunch of scripts does? If you've tried out your project already you might be wondering how it is supposed to bounce off the walls. Well, this is how! It looks like a lot, but we've already done something more involved with bouncing off groundLevel. I checked to see at what position my ball was at when it was barely touching the side and I got the number 212. This if statement is asking if the absolute value of my position is greater than 212 (it's asking if I'm touching either side). If I'm touching a side, I set my xVelocity to be the opposite of my current xVelocity by multiplying it by -1. |
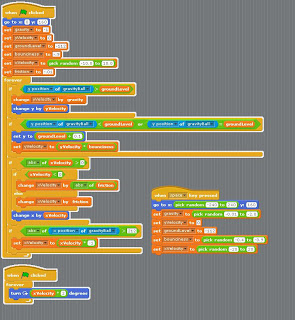 |
| This is what our scripts look like at the end of it all. That's a whole bunch! |
Since we are changing our x position by xVelocity, this means that if we hit the left wall going -4, the next step will make xVelocity be 4 (a positive number) and move us 4 to the right.
 |
| I also added in this little bit of script to make it look like my ball was turning over as it bounced around. Since xVelocity can be a negative number, it will sometimes turn "backwards" but look exactly as it should. Try it out with your sprite! |
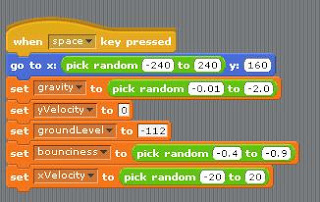 |
| The last thing I did was make sure I could test out my variables without having to press the green flag over and over again. To do that I made this little block which is activated by pressing the 'space' key. It randomizes a few variables and keeps others constant as necessary for our work. |
I hope you had fun doing this tutorial! I sure had fun making it. Now you can incorporate these scripts into your own projects, whether for your hero or just a bunch of bouncing balls.


